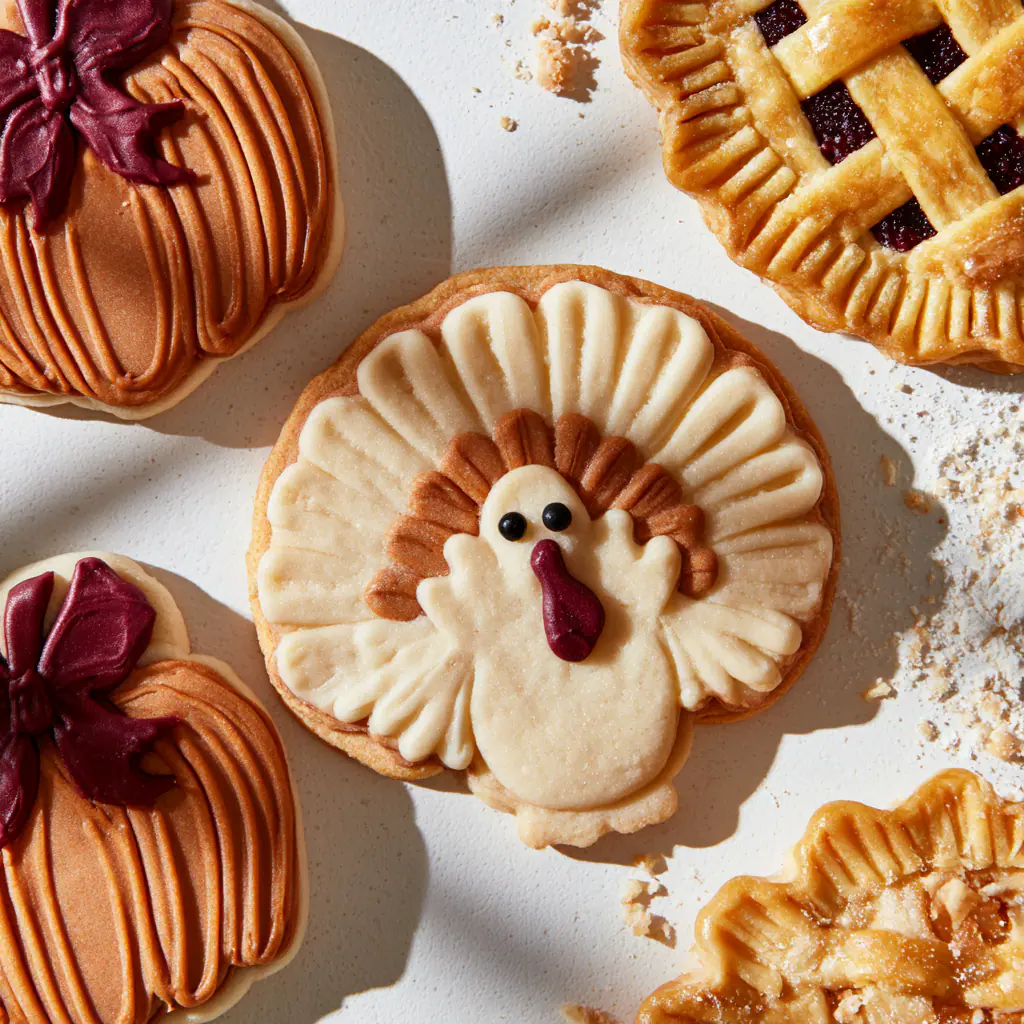
Cream butter and sugar: Beat the softened butter and granulated sugar together on medium speed until the mixture turns pale and fluffy, about 2 minutes. Scrape down the bowl so everything blends evenly.
Add egg and extracts: Beat in the egg, vanilla extract and almond extract if using, mixing just until combined. The batter should look smooth with no streaks of egg.
Mix in dry ingredients: Whisk the flour, baking powder and salt together in a separate bowl, then add to the butter mixture in two additions. Mix on low speed just until no dry flour remains visible.
Chill the dough: Divide the dough into two flat disks, wrap in plastic, and refrigerate for at least 1 hour or up to 3 days. Chilled dough holds its shape much better once it hits the oven.
Roll and cut shapes: On a lightly floured surface, roll the dough to about 1/4 inch thick. Cut into turkey, leaf or pumpkin shapes and transfer to a parchment-lined baking sheet, leaving 1 inch between cookies.
Bake the cookies: Bake at 350°F for 8 to 10 minutes, until the edges look set but have not started to brown. Let the cookies cool on the pan for 5 minutes before moving them to a wire rack.
Cool completely: Let the cookies cool fully, about 30 minutes, before icing. Icing a warm cookie causes the icing to slide off the edges instead of setting in place.
Make outline icing: Whisk the meringue powder with 6 tablespoons of warm water until foamy, then beat in the powdered sugar until the icing holds a stiff peak when you lift the whisk. Tint portions with gel food coloring for feathers, leaves and other details.
Thin the flood icing: Take a portion of the stiff icing and stir in warm water, one teaspoon at a time, until a knife dragged through the surface disappears in about 10 seconds. This thinner icing fills the centers smoothly.
Outline each cookie: Fill a piping bag fitted with a small round tip with the stiff icing and trace the border of each cookie. Let the outline firm up for a few minutes before flooding.
Flood the centers: Fill the inside of each outline with the thinned icing using a squeeze bottle or piping bag, then spread it to the edges with a toothpick. Pop any air bubbles with the toothpick tip as you go.
Dry and add details: Let the iced cookies sit flat and uncovered for 6 to 8 hours or overnight until the surface feels hard to the touch. Pipe on feathers, stems or small faces with remaining colored icing, then let dry another hour before storing.